Activate POS Devices
How to activate POS devices.
Activation Process
Viva’s POS Devices can be broken down into three main categories:
- Android & iOS – the ‘Viva.com Terminal’ application installed on Android or iOS devices, including Viva terminals and ‘Tap on Phone’
- Paydroid – the ‘Viva.com Terminal’ application installed on PAX devices such as the A910, A920, A80 & IM30 terminals
- Prolin – Linux-based devices such as the Q30 terminal
Android & iOS
Android & iOS devices can be activated in two ways:
By signing in
Open the Viva Terminal app and, on the Activation Method Selection screen, select option 1 (‘Sign in’).
Instruction Screen - 1 Instruction Screen - 2 Activation Method Selection 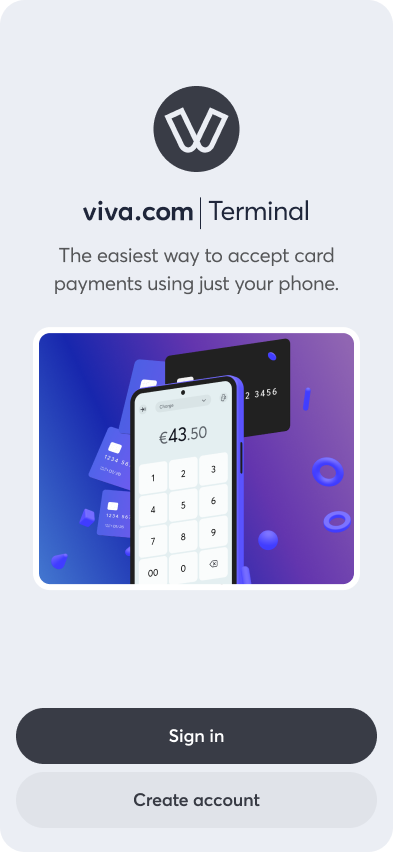
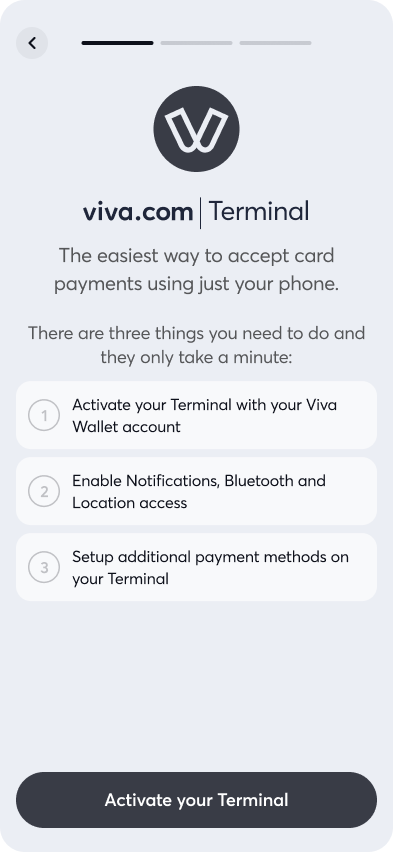
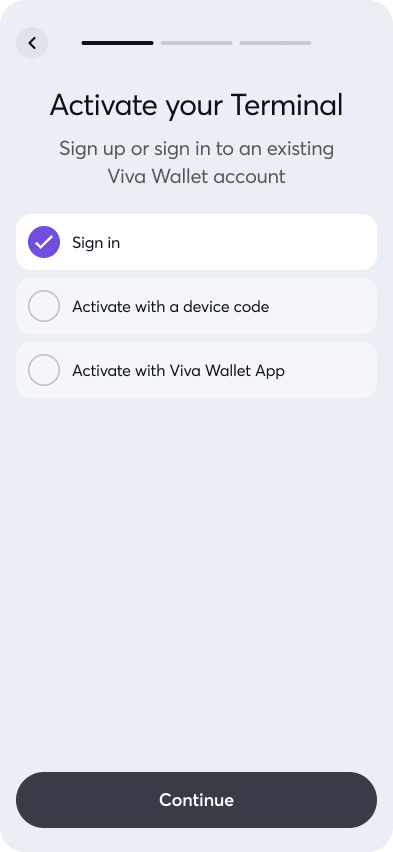
You will then be taken to a login page, where you can log in to your Viva account:
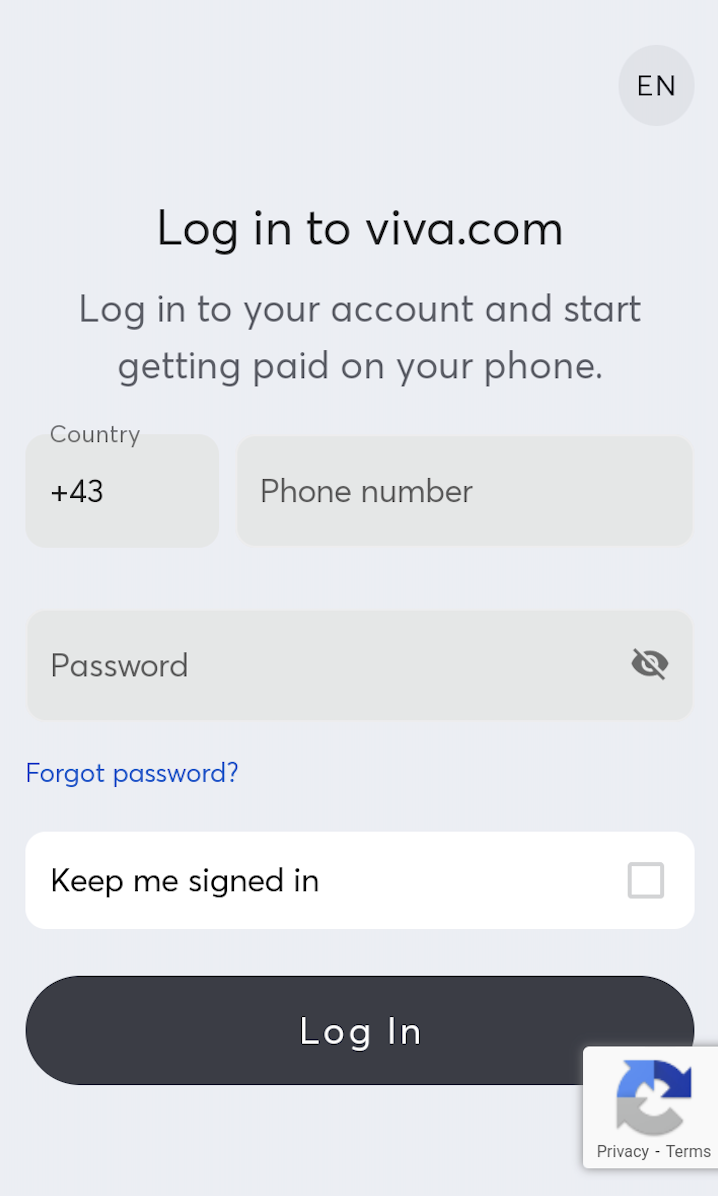
After logging in, you will be prompted to select an account for activation. Once activated, a confirmation screen will be displayed:
Account Selection Activation in progress Activation completed 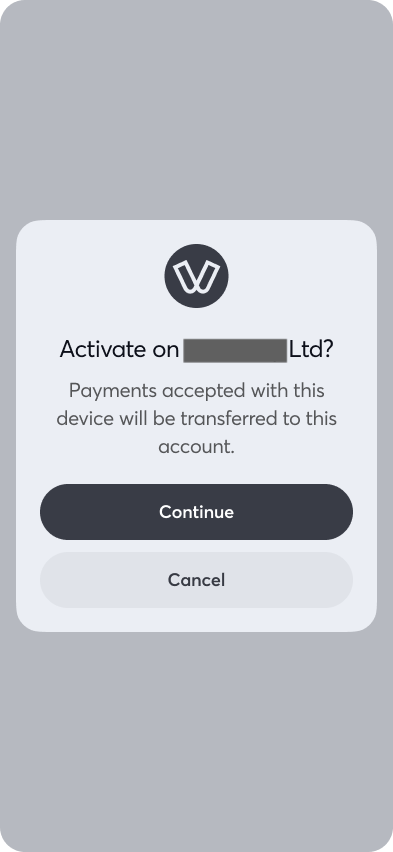

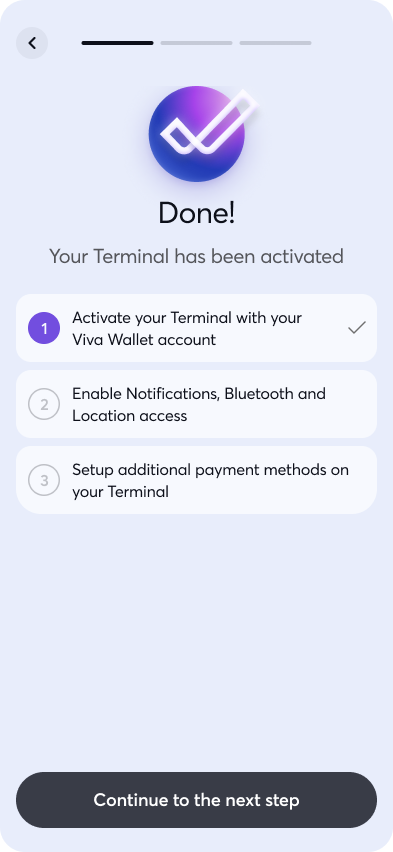
You can then complete the setup of your device. Depending on the device, this may include connecting external devices such as card readers, activating MOTO functionality, activating QR code functionality and configuring device permissions
By using a device code
On the Activation Method Selection screen, select option 2 (‘Activate with a device code’).
Activation Method Selection Activation Code Screen 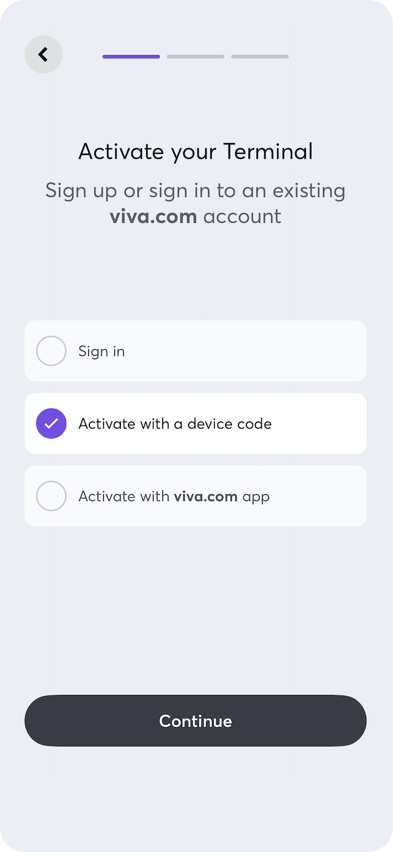

The device will then display a 9-digit activation code. To proceed, you will need to do one of the following:
Enter the code within your self-care account:
Log into your Viva self-care account and navigate to Sales > Physical Payments > Card Terminals:
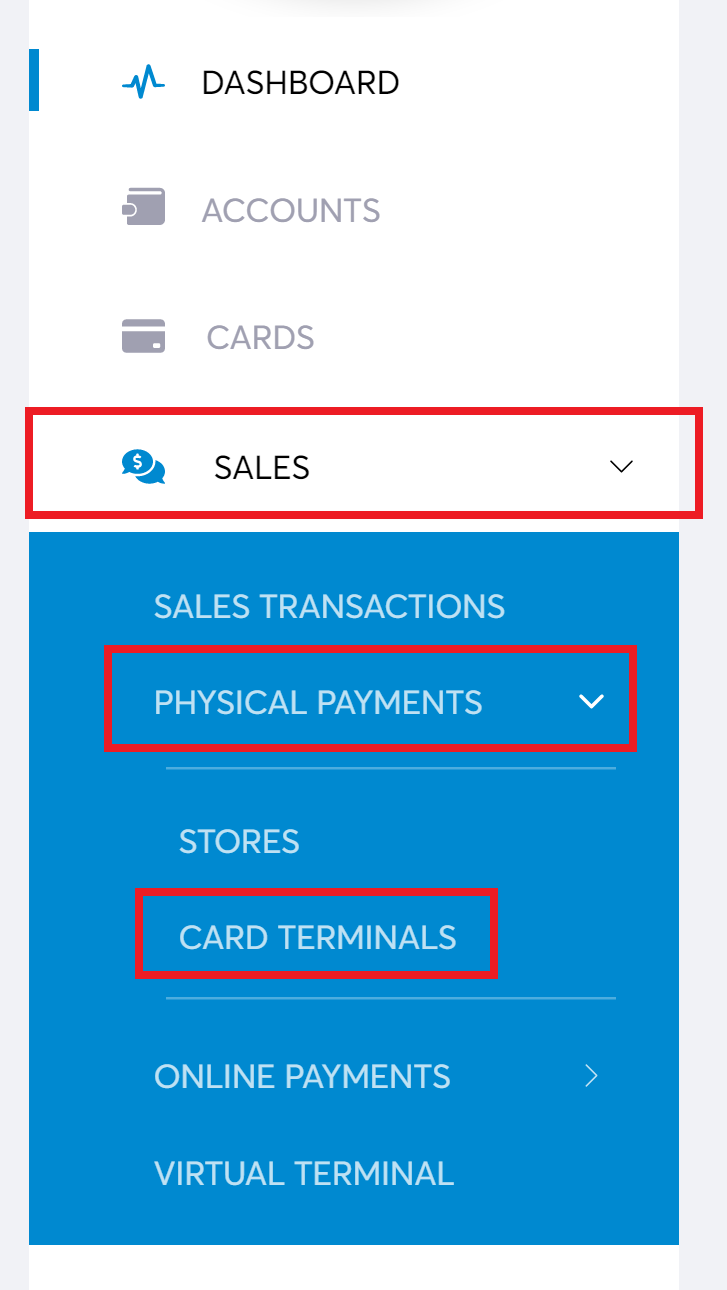
Click on the ‘New Card Terminal’ button at the top-right of the screen:

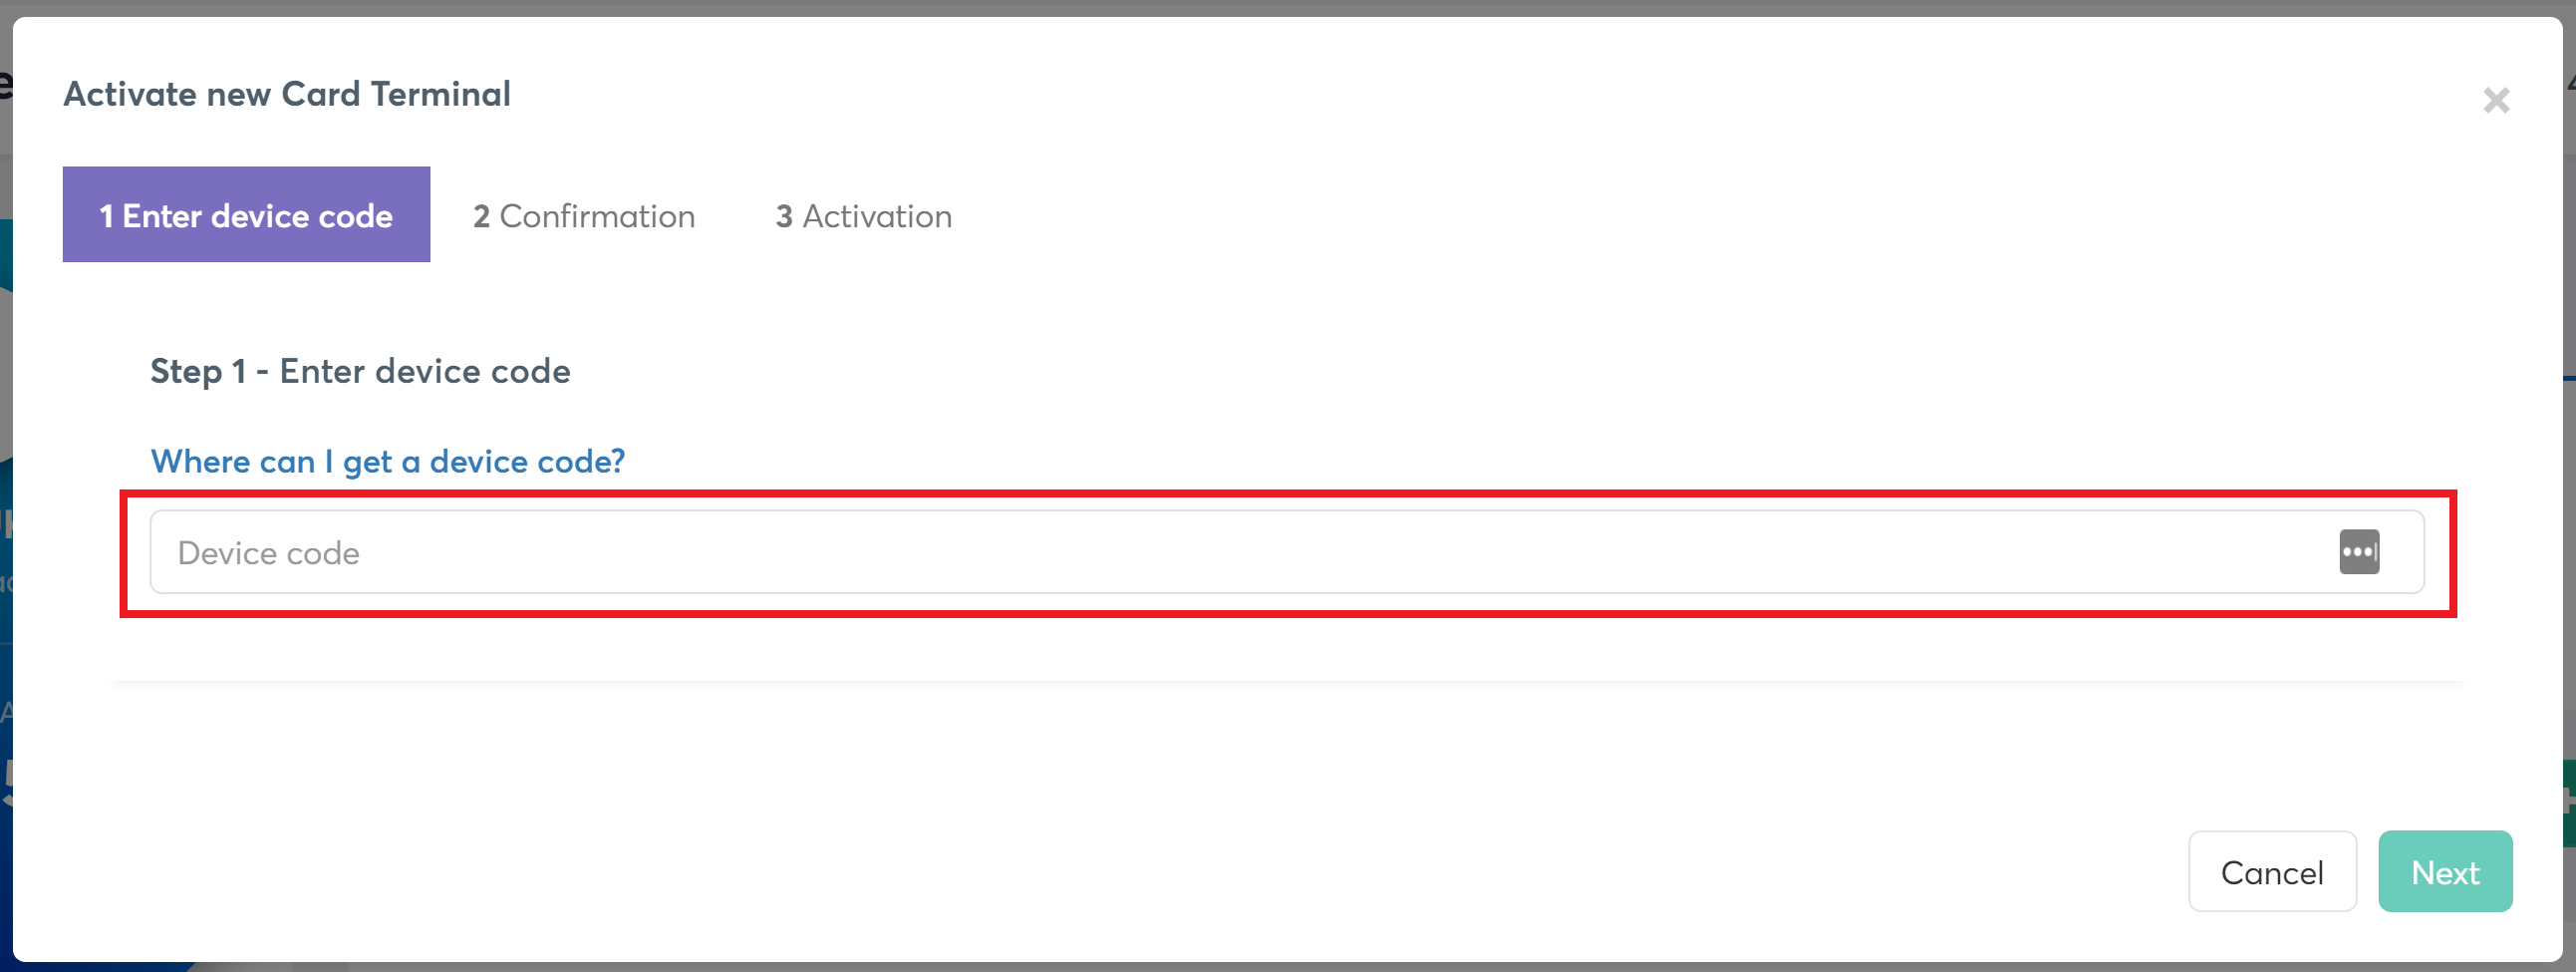
You will need to enter the code from your device before clicking ‘Next’:
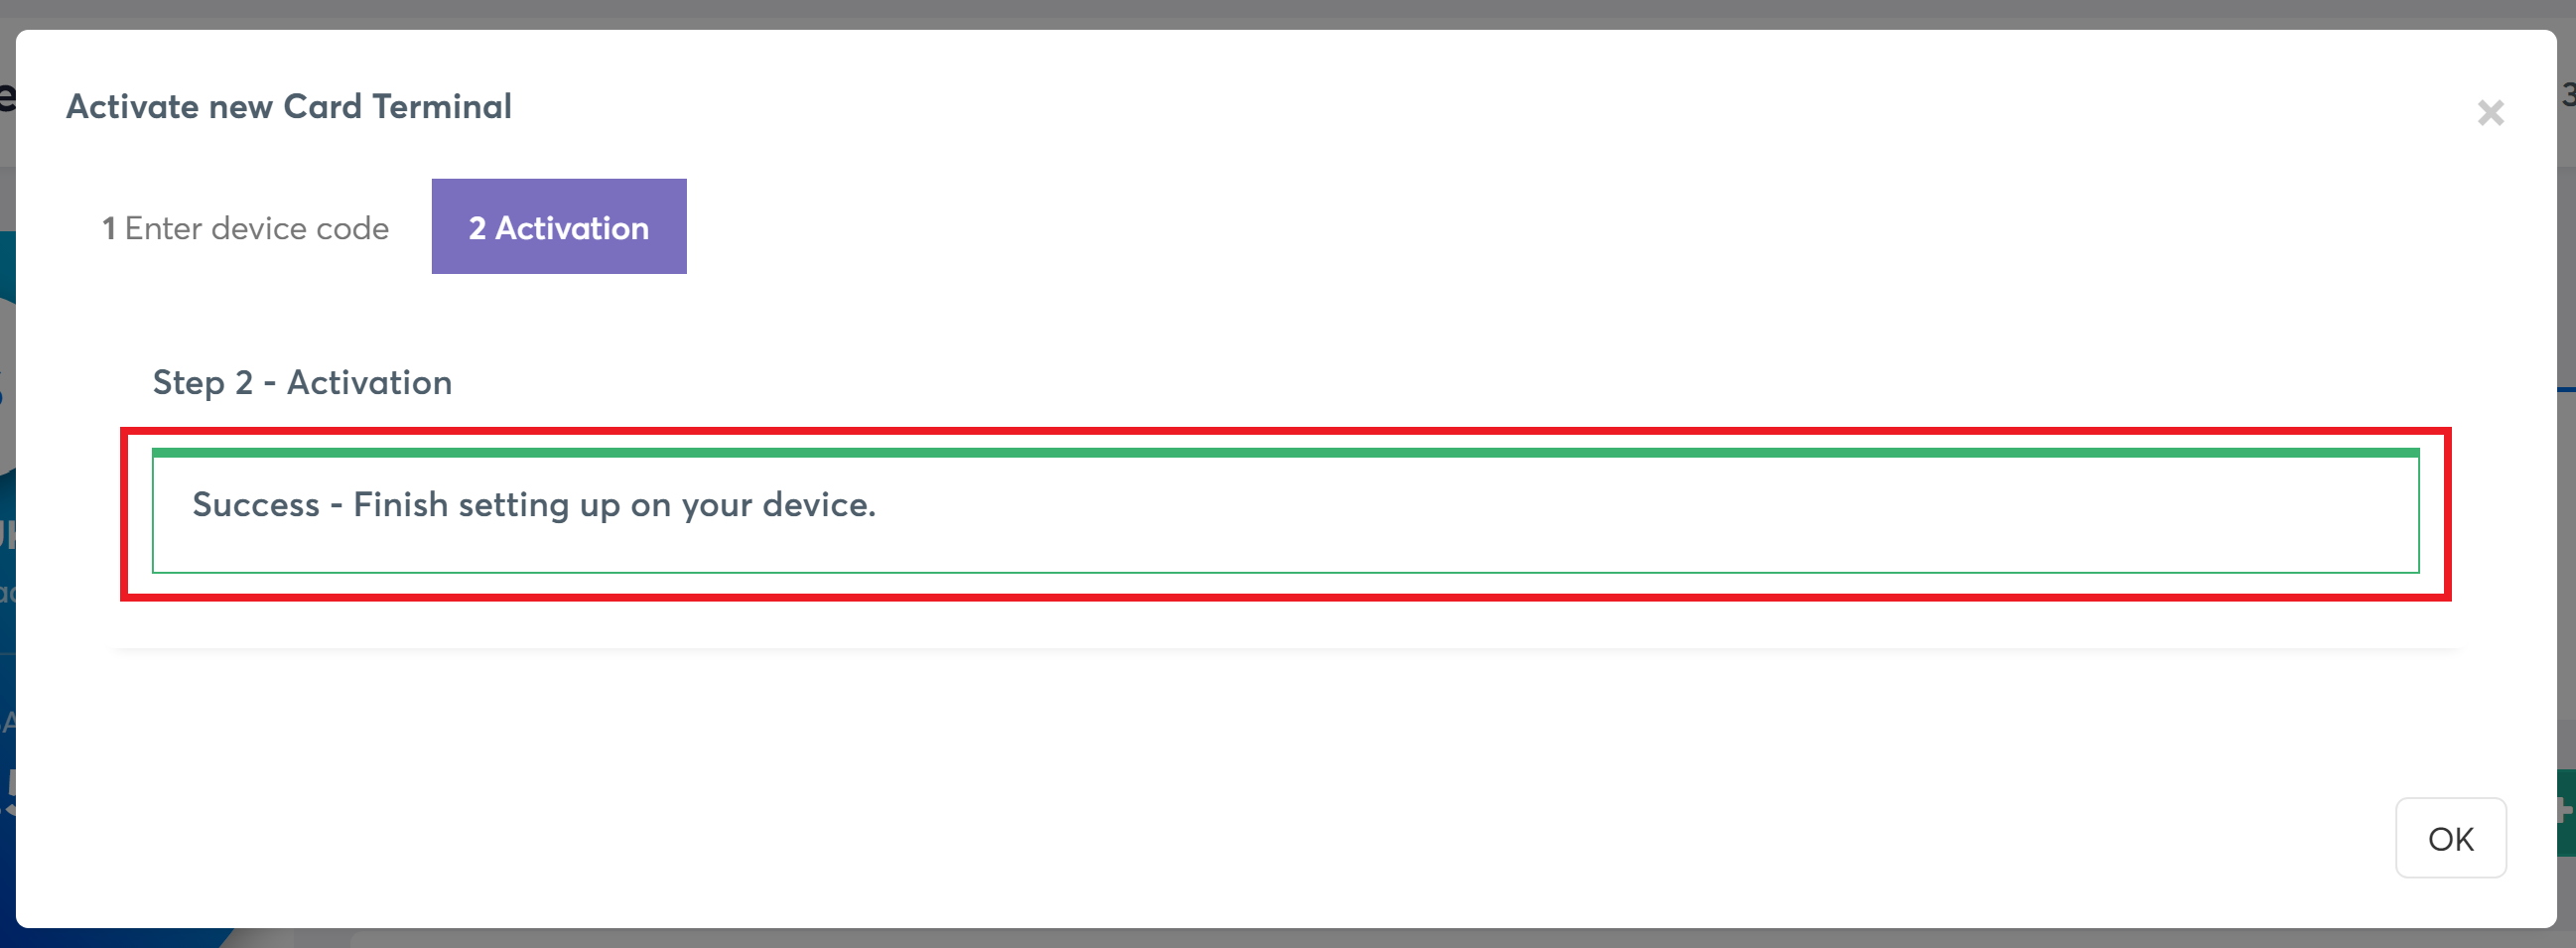
You will then be shown a message, telling you to ‘Finish setting up on your device’:
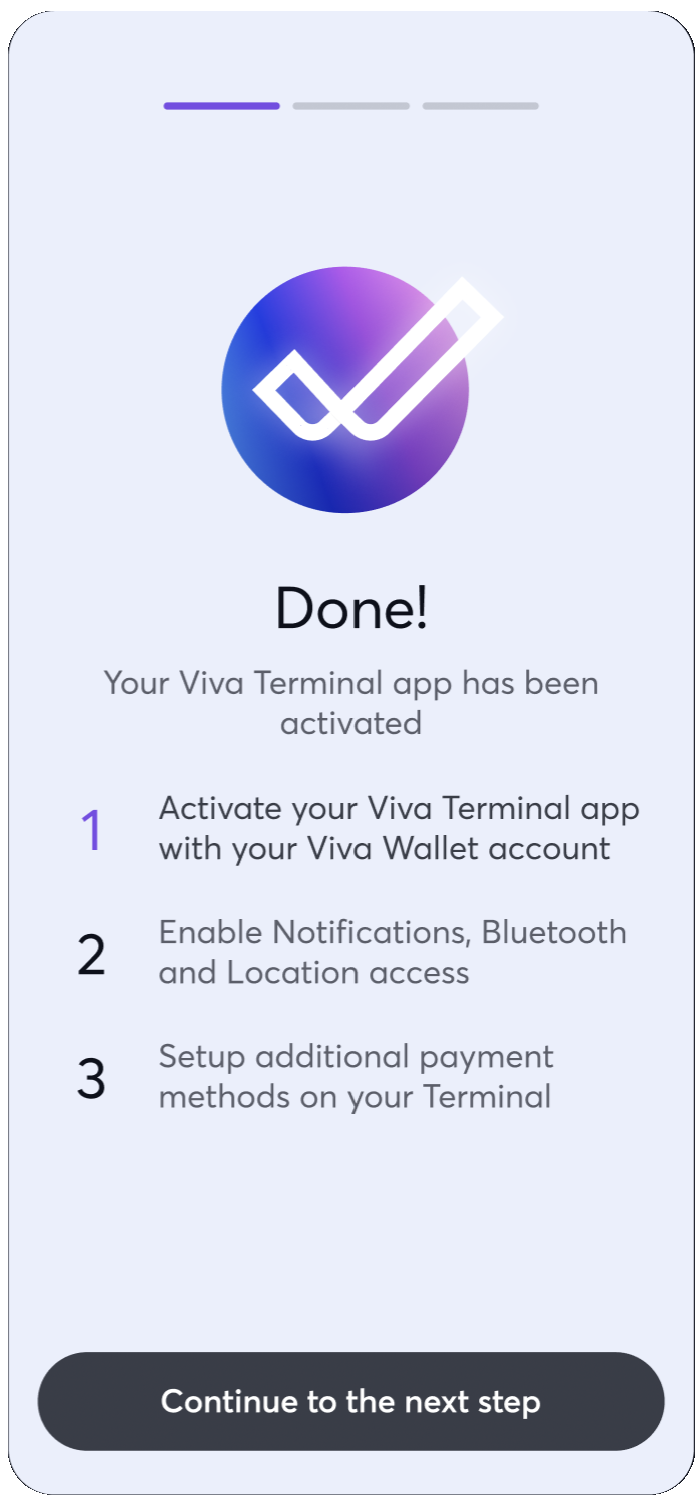
Then, simply confirm the prompt shown on your device to proceed and complete the setup of your device:
Enter or scan the code within your viva banking app:
You can download the viva banking app from the Google Play Store (for Android) or from the App Store (for iOS)
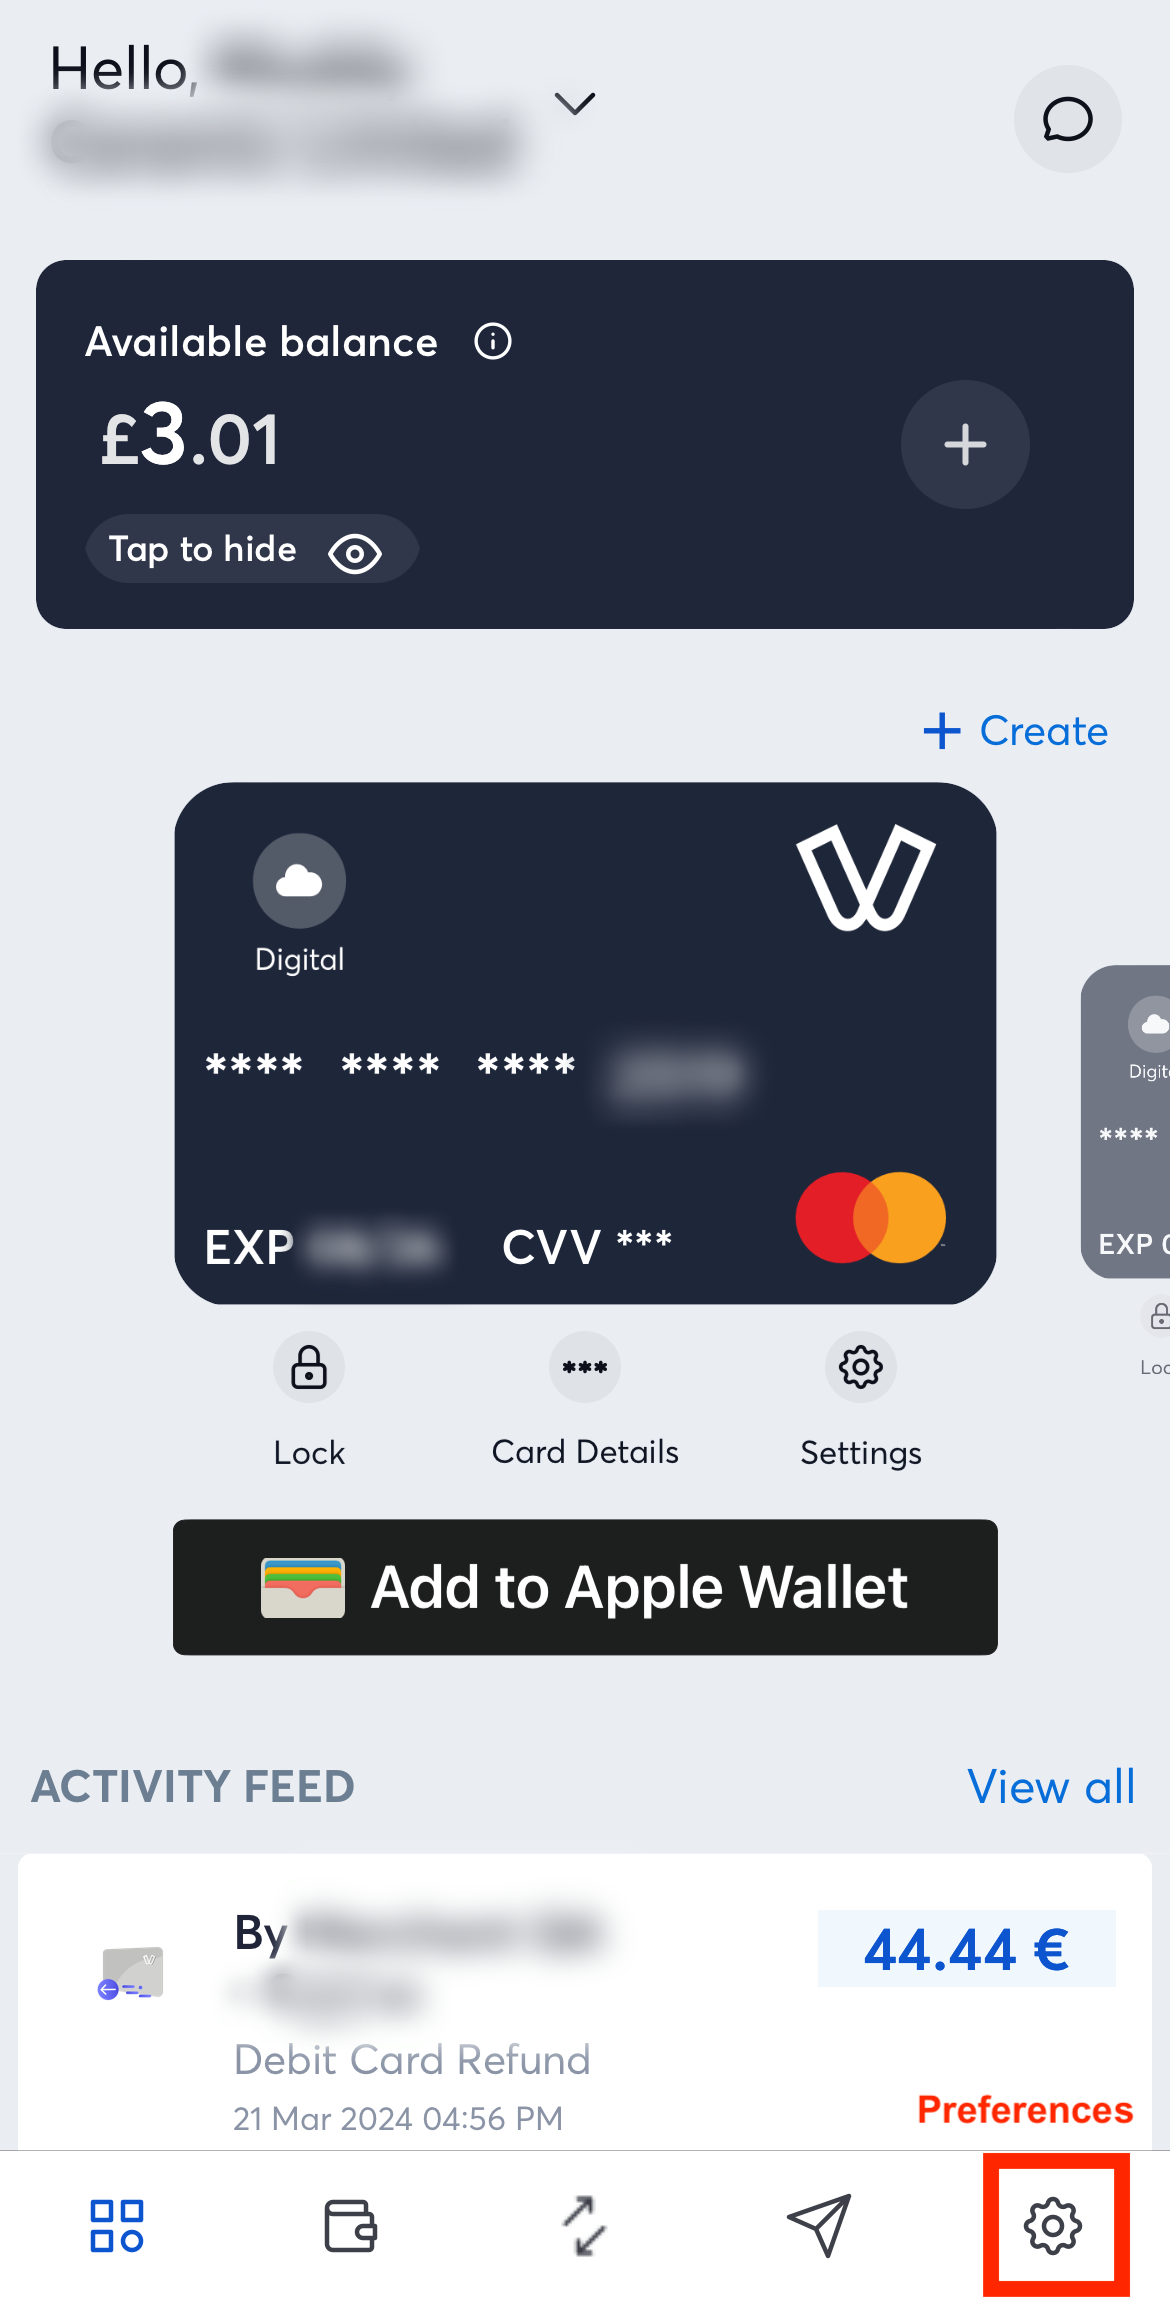
1. Log into your viva banking app and click on the Preferences tab at the bottom-right:
2. Click on the ‘Activate a Viva Terminal’ menu option:
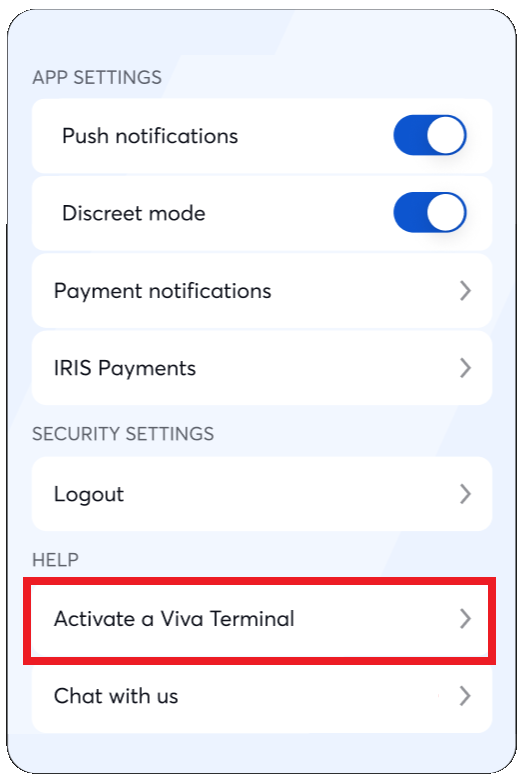
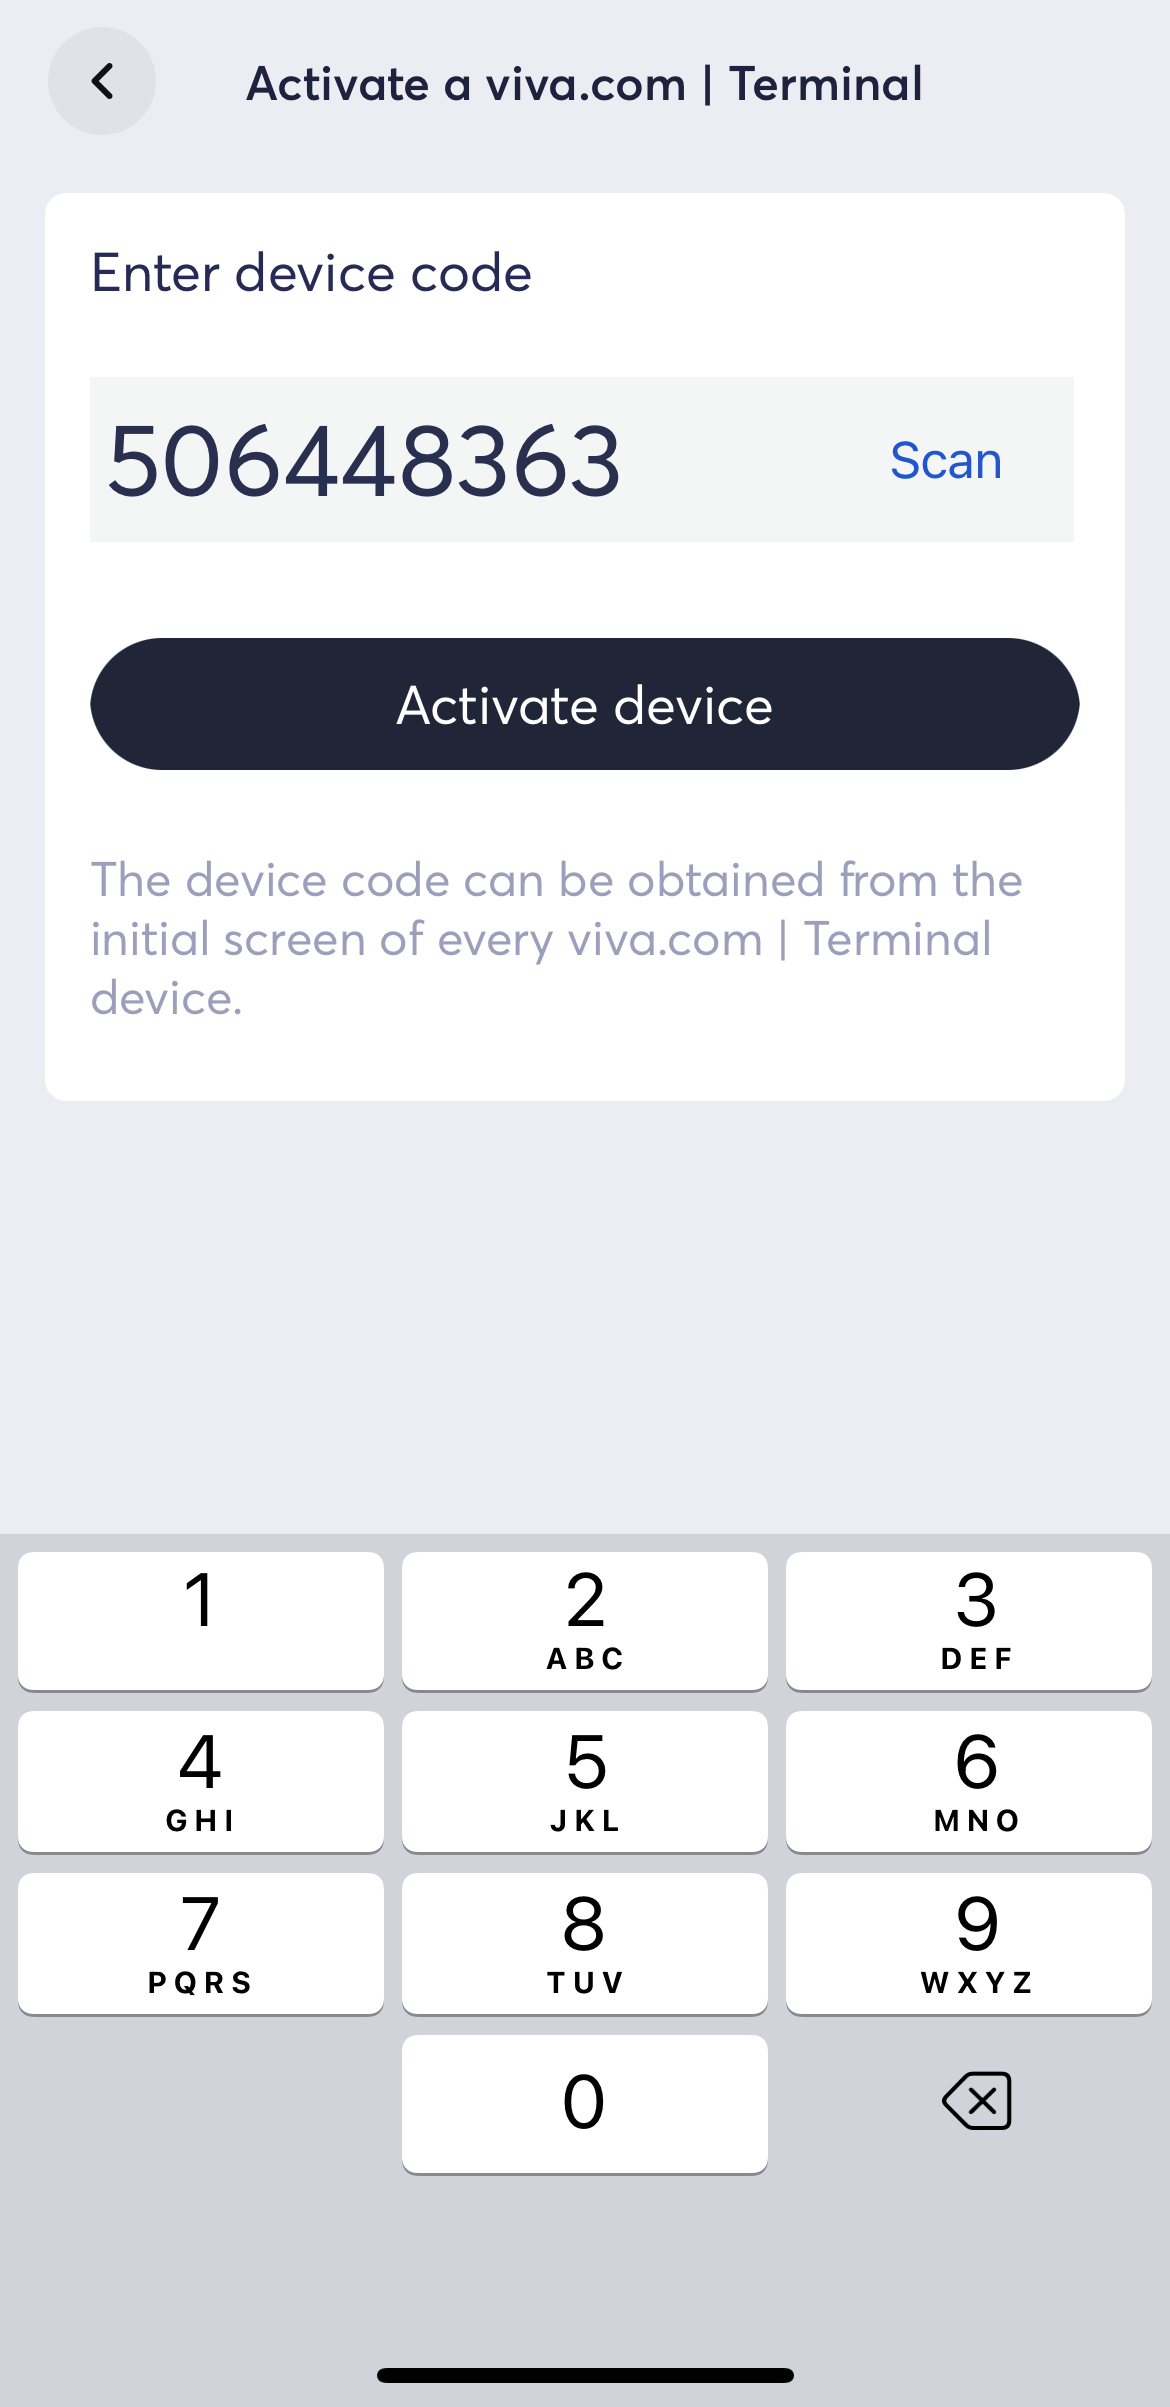
3. You can then manually enter or scan the code from your POS device - the latter option bringing up your camera to allow you to take a photo of the device code:
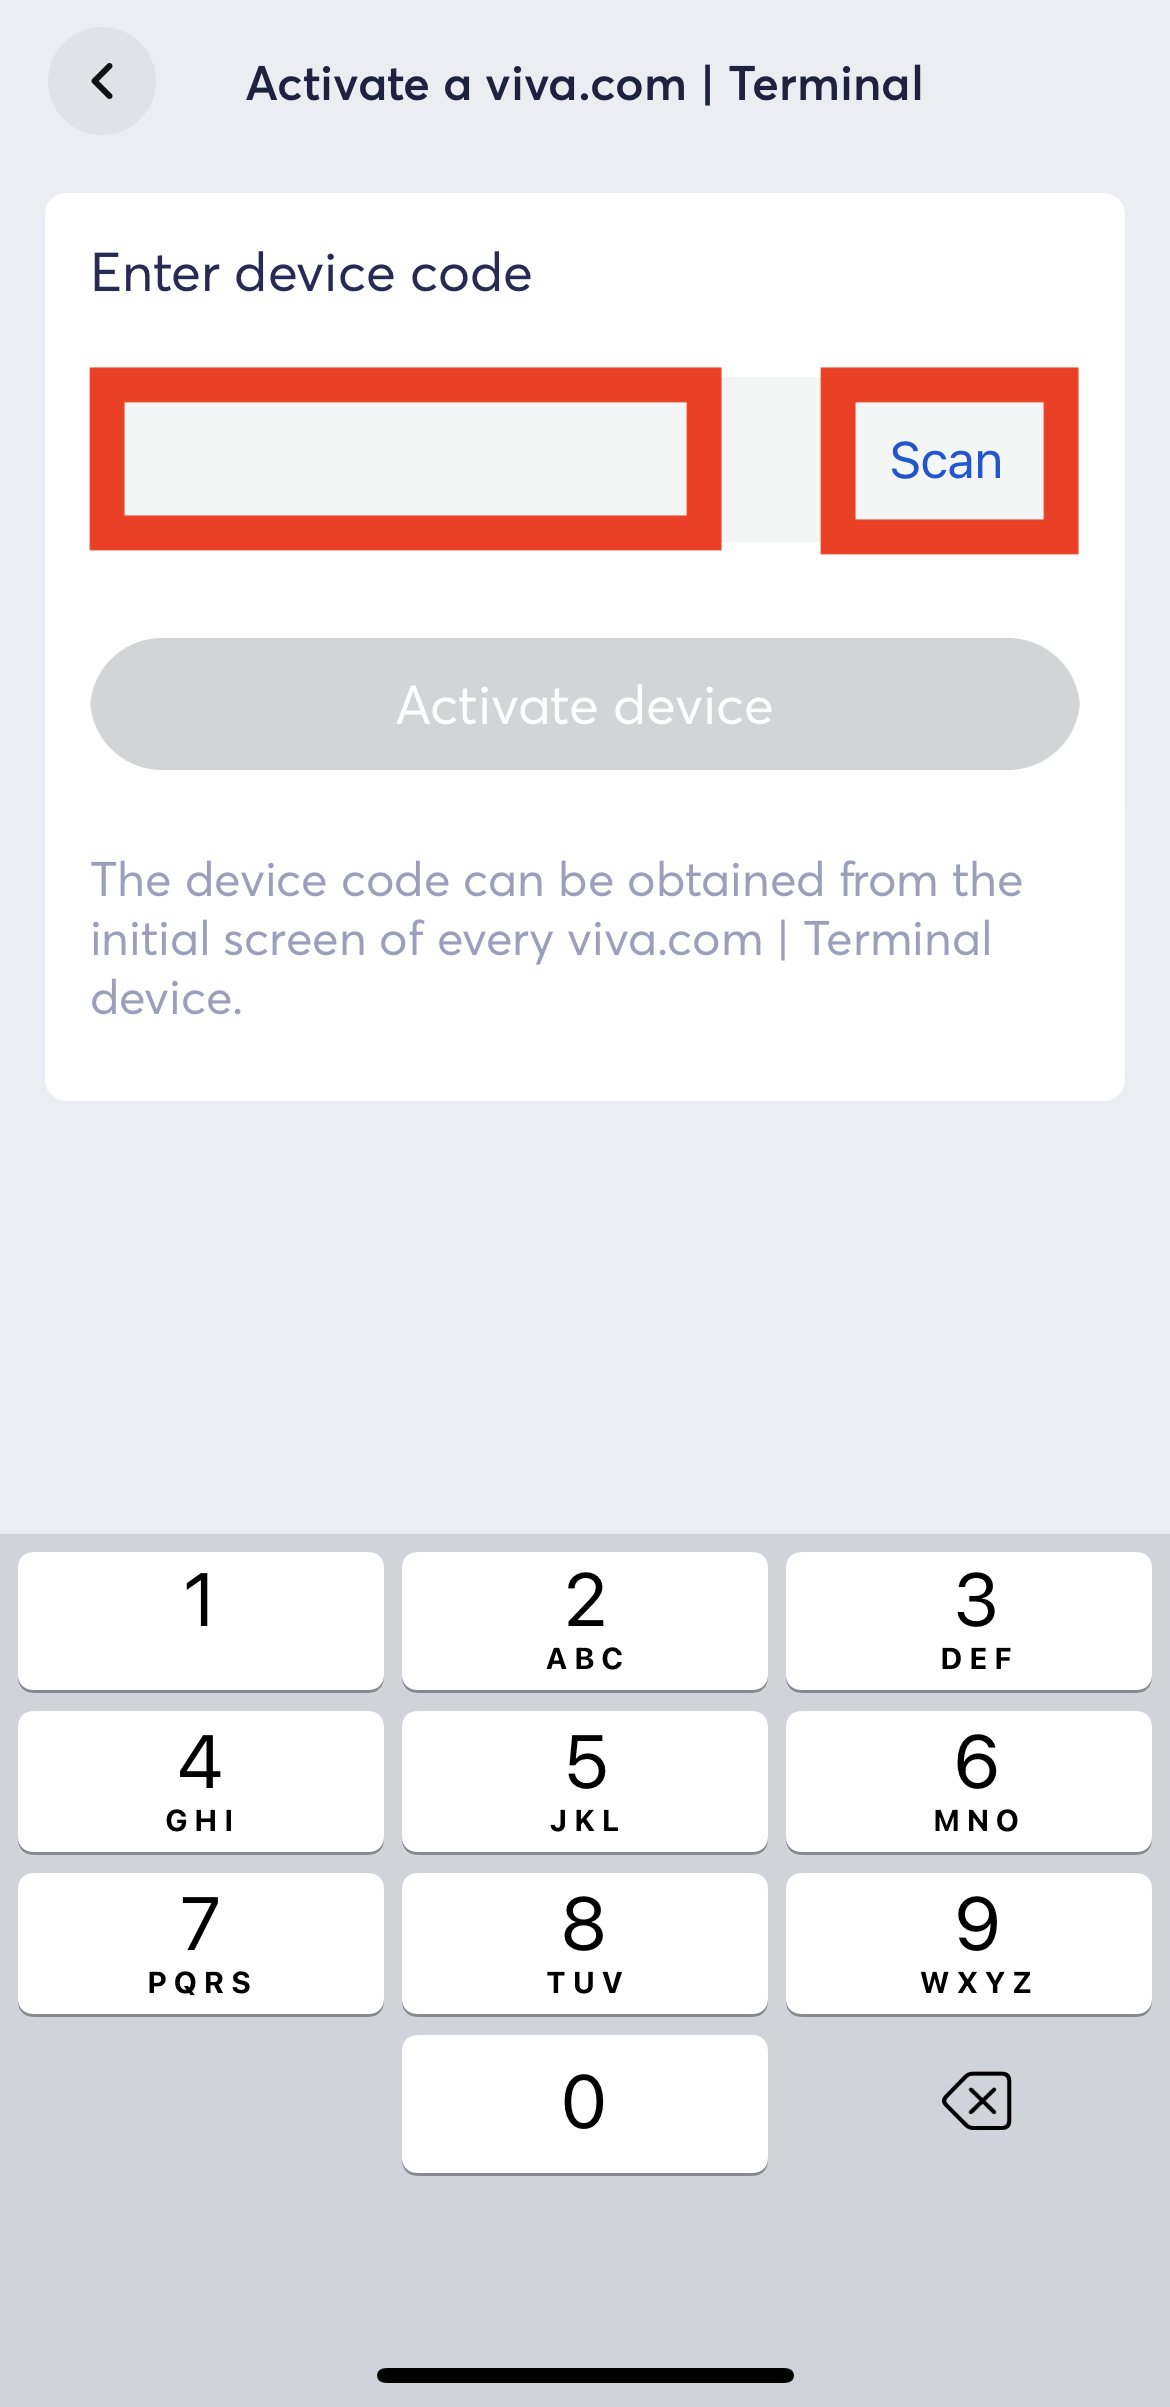
Please note: as well as Optical Character Recognition (OCR), this scanning functionality also allows for the scanning of QR codes
4. Once manually entered or scanned, click the ‘Activate Device’ button to proceed
5. You will then see a message to confirm activation is successful:
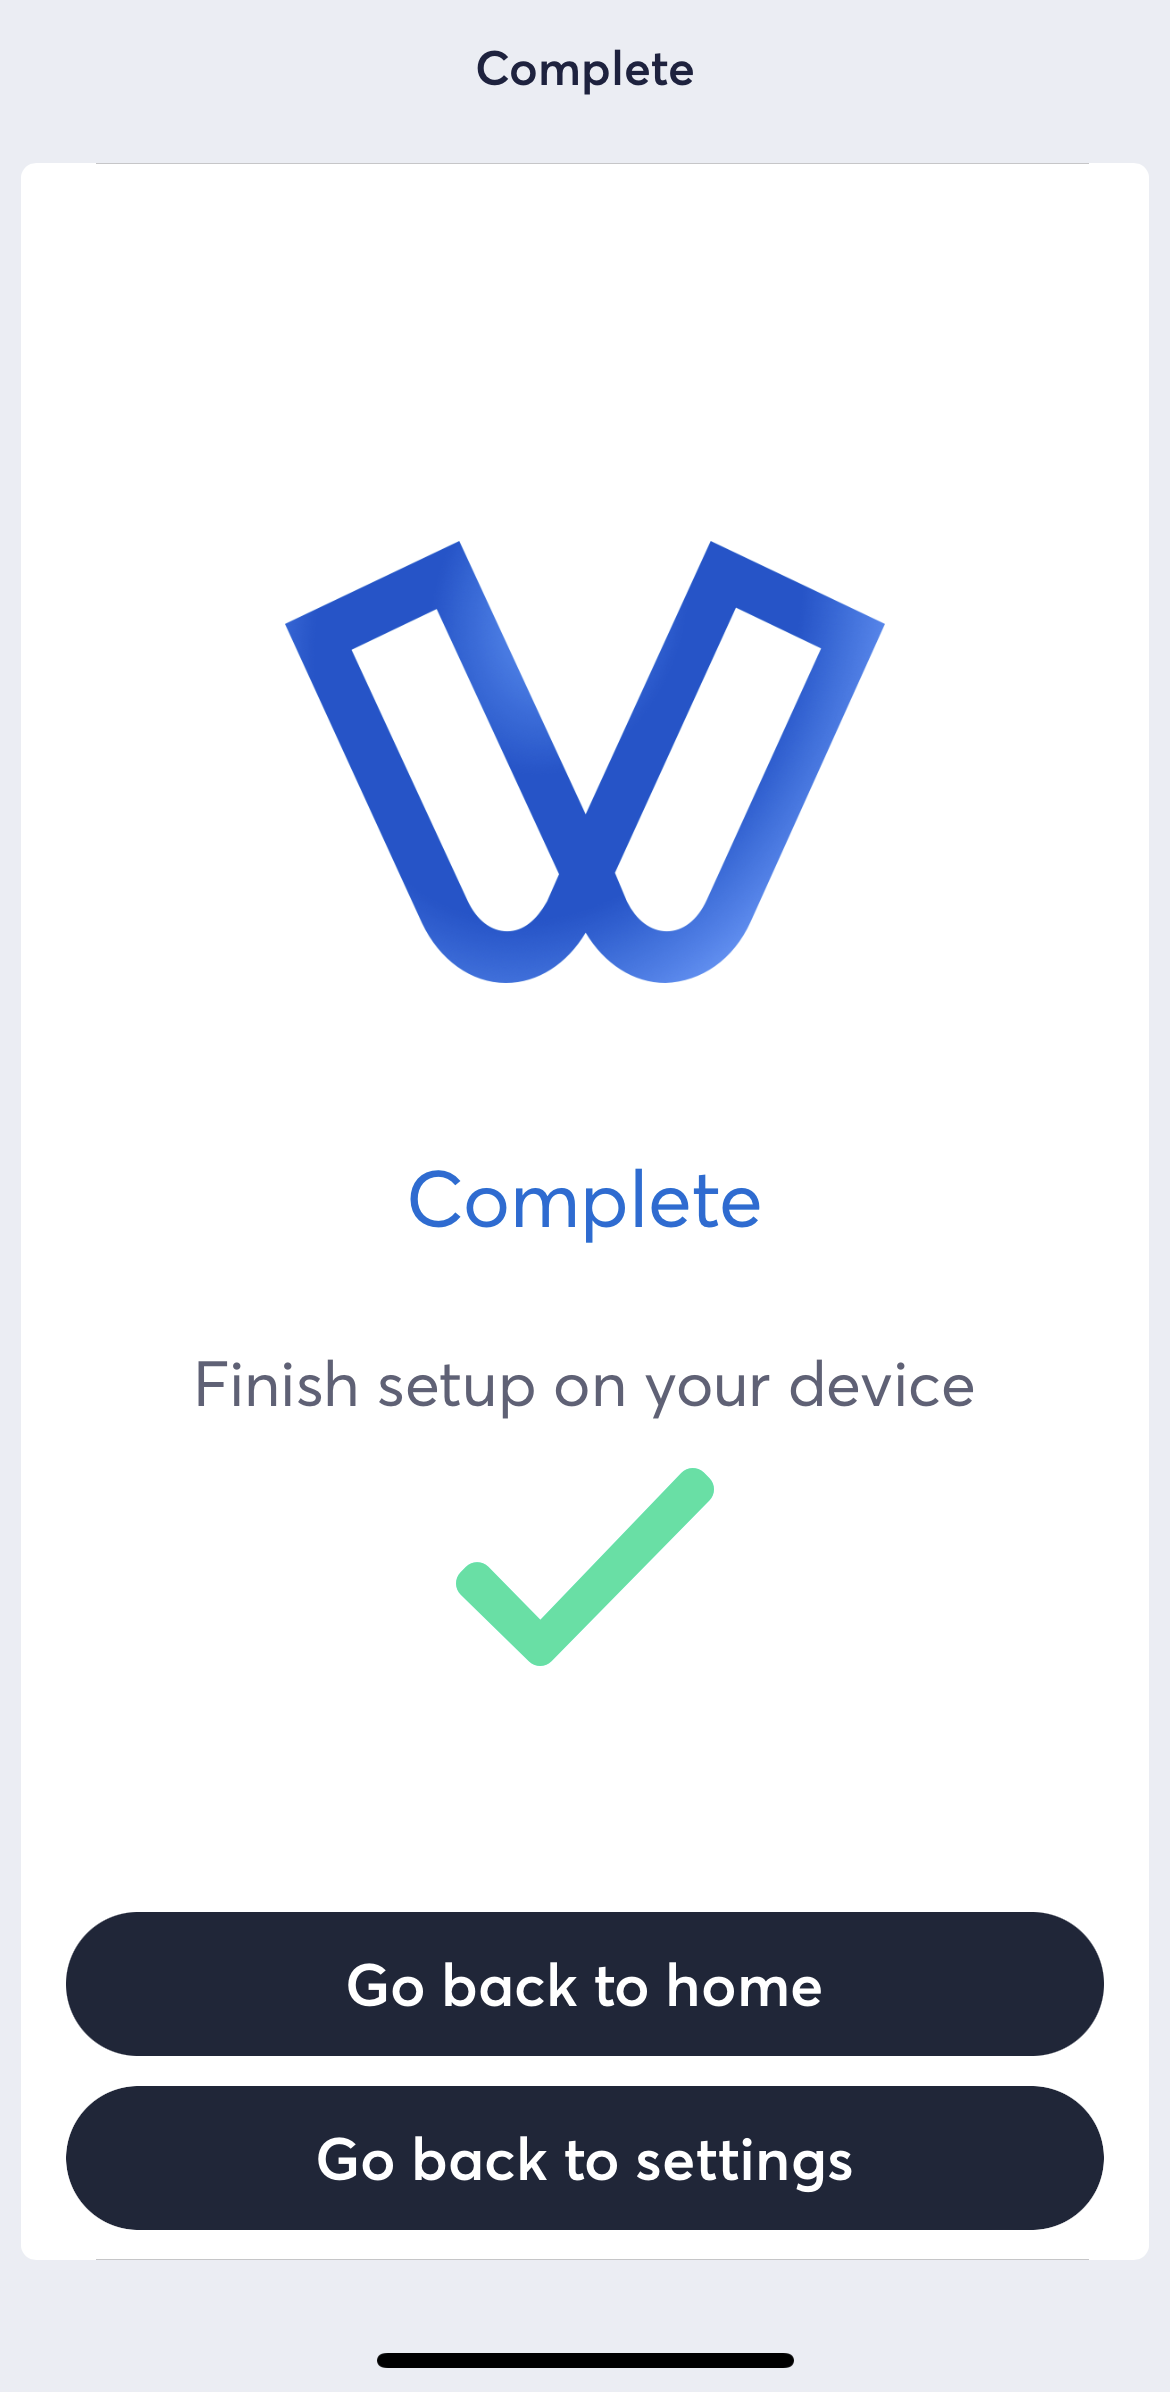
6. Lastly, you will be shown an activation prompt on your terminal device. Simply confirm the prompt and proceed to complete the setup of your device:

By using Viva.com Banking App
Please note, this activation method will only be visible if the device has the Viva.com banking application installed
Open the Viva terminal app and, on the Activation Method Selection screen, select option 3 (Activate with Viva Wallet App’).
Instruction Screen - 1 Instruction Screen - 2 Activation Method Selection 

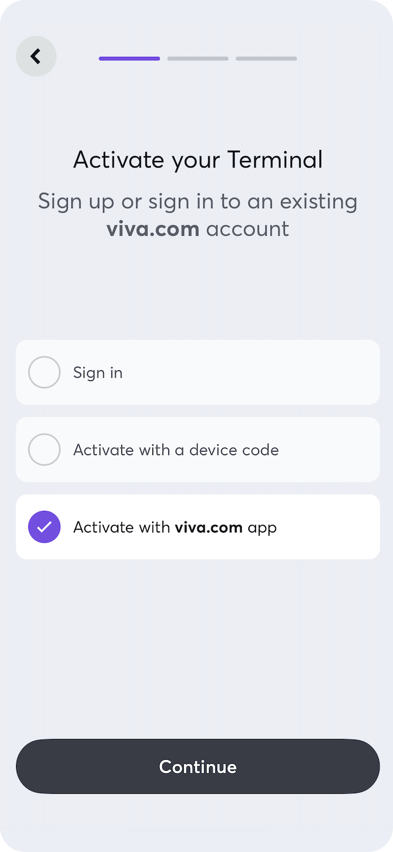
You will then be taken to Viva.com banking application , where you can log in to your Viva account:
Account Selection Activation in progress Activation completed 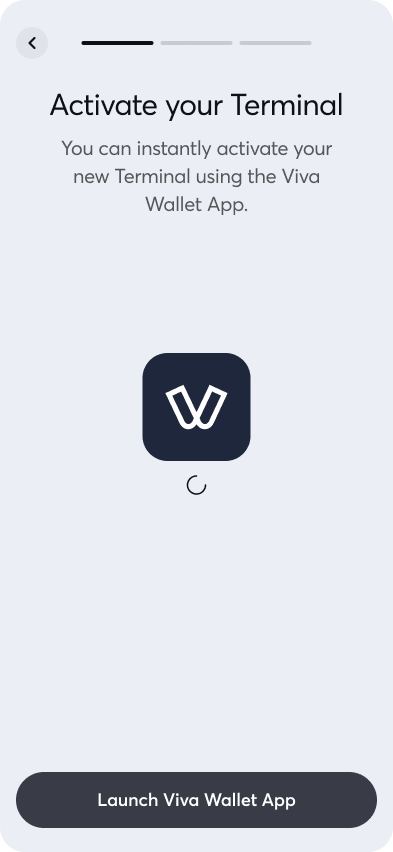


Paydroid
Paydroid devices can be activated only by using an activation code:
On the device, the Activation screen will display a ‘User Activation Code’ button. Click this and then take a note of the code shown on your device:
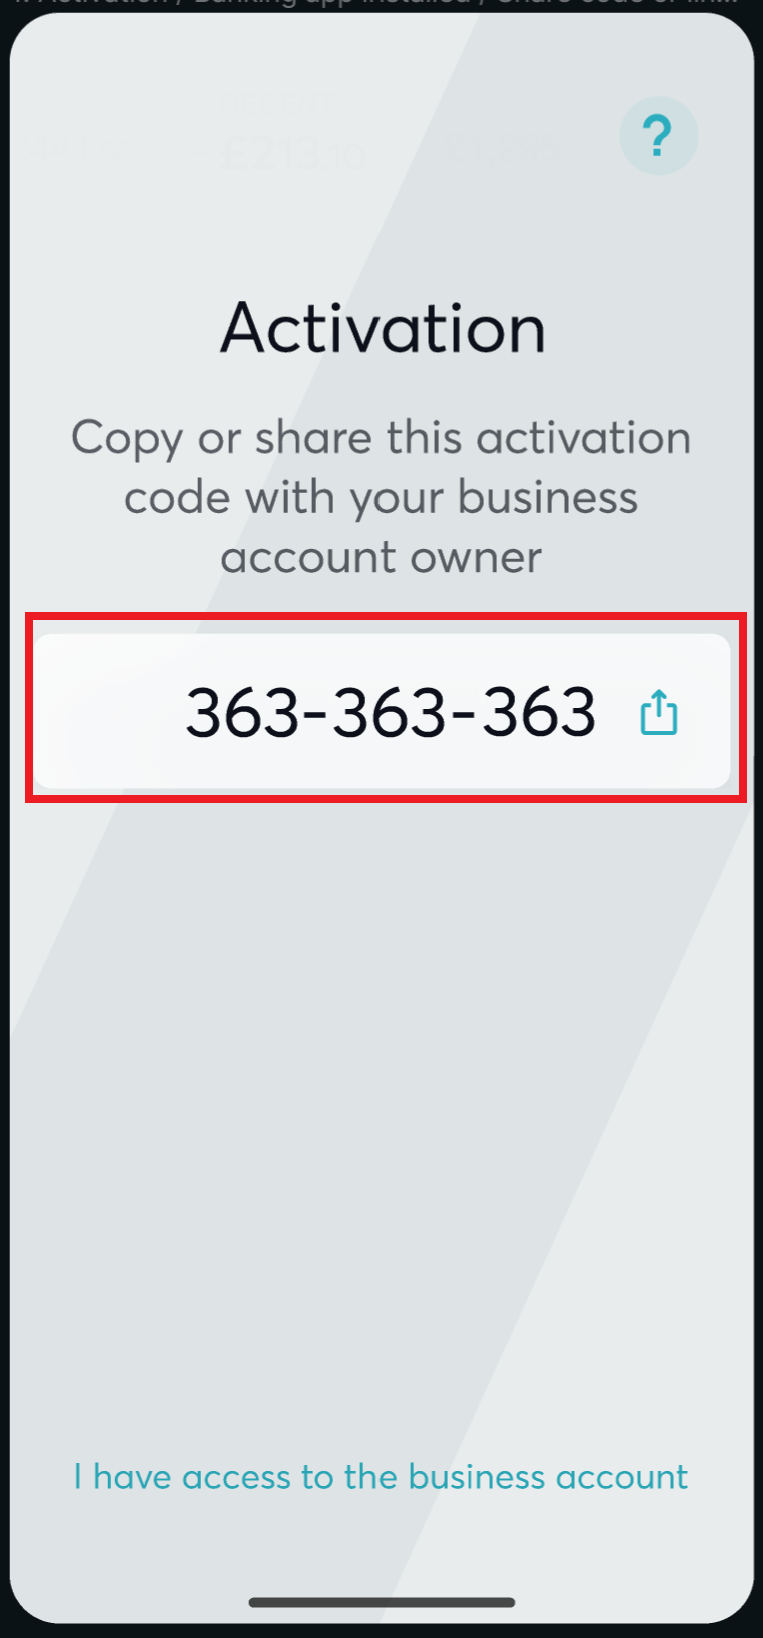
To proceed, you will need to do one of the following:
Enter the code within your self-care account:
Log into your Viva self-care account and navigate to Sales > Physical Payments > Card Terminals:

Click on the ‘New Card Terminal’ button at the top-right of the screen:

You will need to enter the code from your device before clicking ‘Next’:
You will then be shown a message, telling you to ‘Finish setting up on your device’:
Simply confirm the prompt shown on your device to proceed:
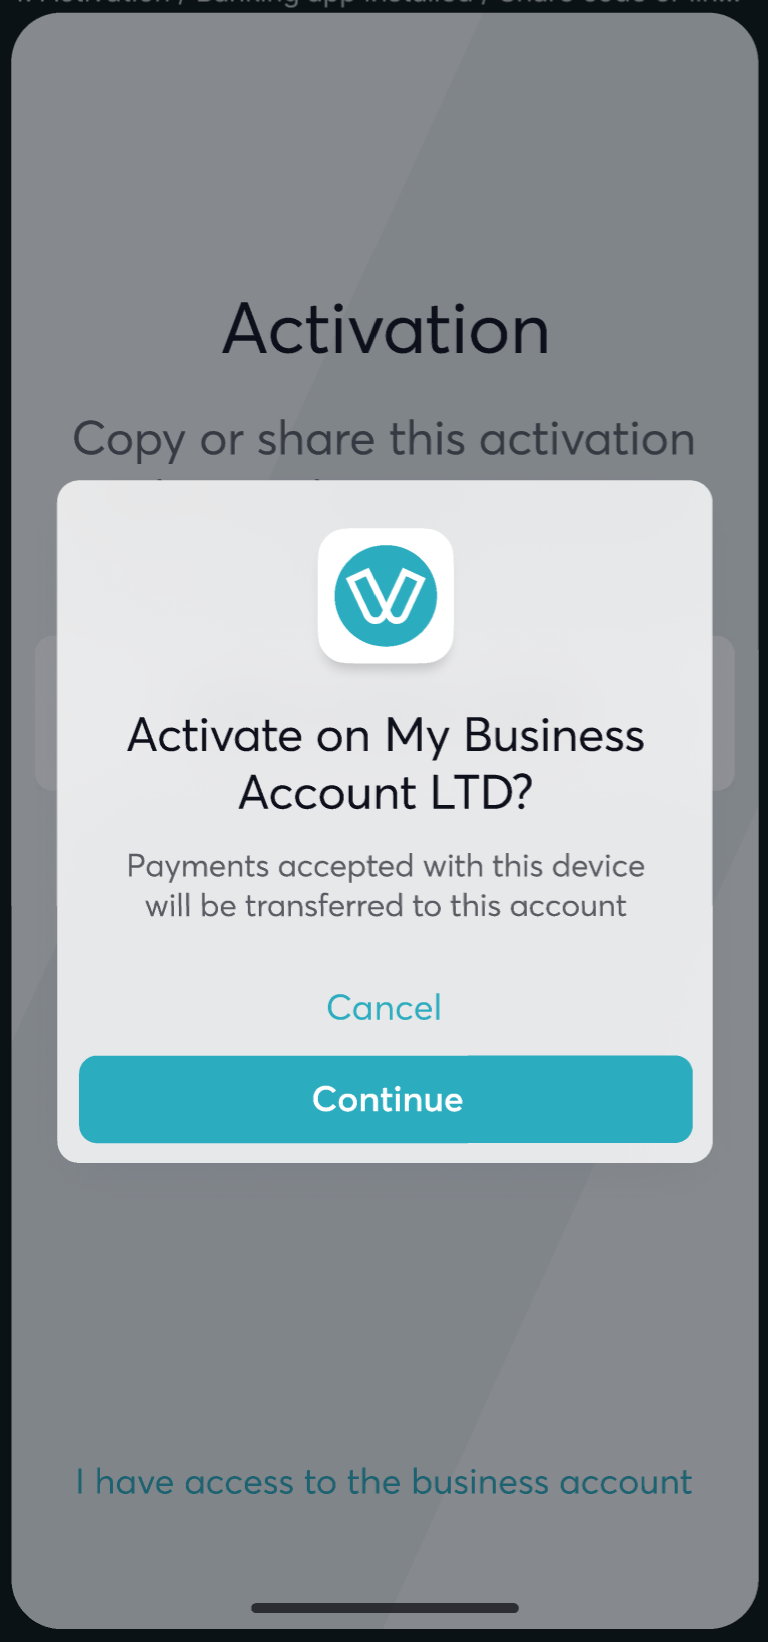
You can then complete the setup of your device. Depending on the device, this may include connecting external devices such as card readers, activating MOTO functionality, activating QR code functionality and configuring device permissions
Enter or scan the code within your viva banking app:
You can download the viva banking app from the Google Play Store (for Android) or from the App Store (for iOS)
1. Log into your viva banking app and click on the Preferences tab at the bottom-right:

2. Click on the ‘Activate a Viva Terminal’ menu option:

3. You can then manually enter or scan the code from your POS device - the latter option bringing up your camera to allow you to take a photo of the device code:

Please note: as well as Optical Character Recognition (OCR), this scanning functionality also allows for the scanning of QR codes
4. Once manually entered or scanned, click the ‘Activate Device’ button to proceed
5. You will then see a message to confirm activation is successful:

6. Lastly, you will be shown an activation prompt on your terminal device. Simply confirm the prompt and proceed to complete the setup of your device:

Prolin
Prolin devices can be activated only by using the device’s Serial Number:
You will need to locate the Serial Number of the device. This can normally be found on the bottom of the device and starts with the letters ‘SN’
Once you have located the Serial Number, you can select one of the two following options:
- Enter the Serial Number within your self-care account
- Enter the Serial Number within your viva banking app
Enter the Serial Number within your self-care account:
Log into your Viva self-care account and navigate to Sales > Physical Payments > Card Terminals:

Click on the ‘New Card Terminal’ button at the top-right of the screen:

You will need to enter the Serial Number of your POS device before clicking next and completing the remaining screens:

Enter the Serial Number within your viva banking app:
You can download the viva banking app from the Google Play Store (for Android) or from the App Store (for iOS). The app icon is as below:
![]()
Log into your viva banking app and click on the Preferences tab at the bottom-right:

Click on the ‘Activate a Viva POS’ menu option:
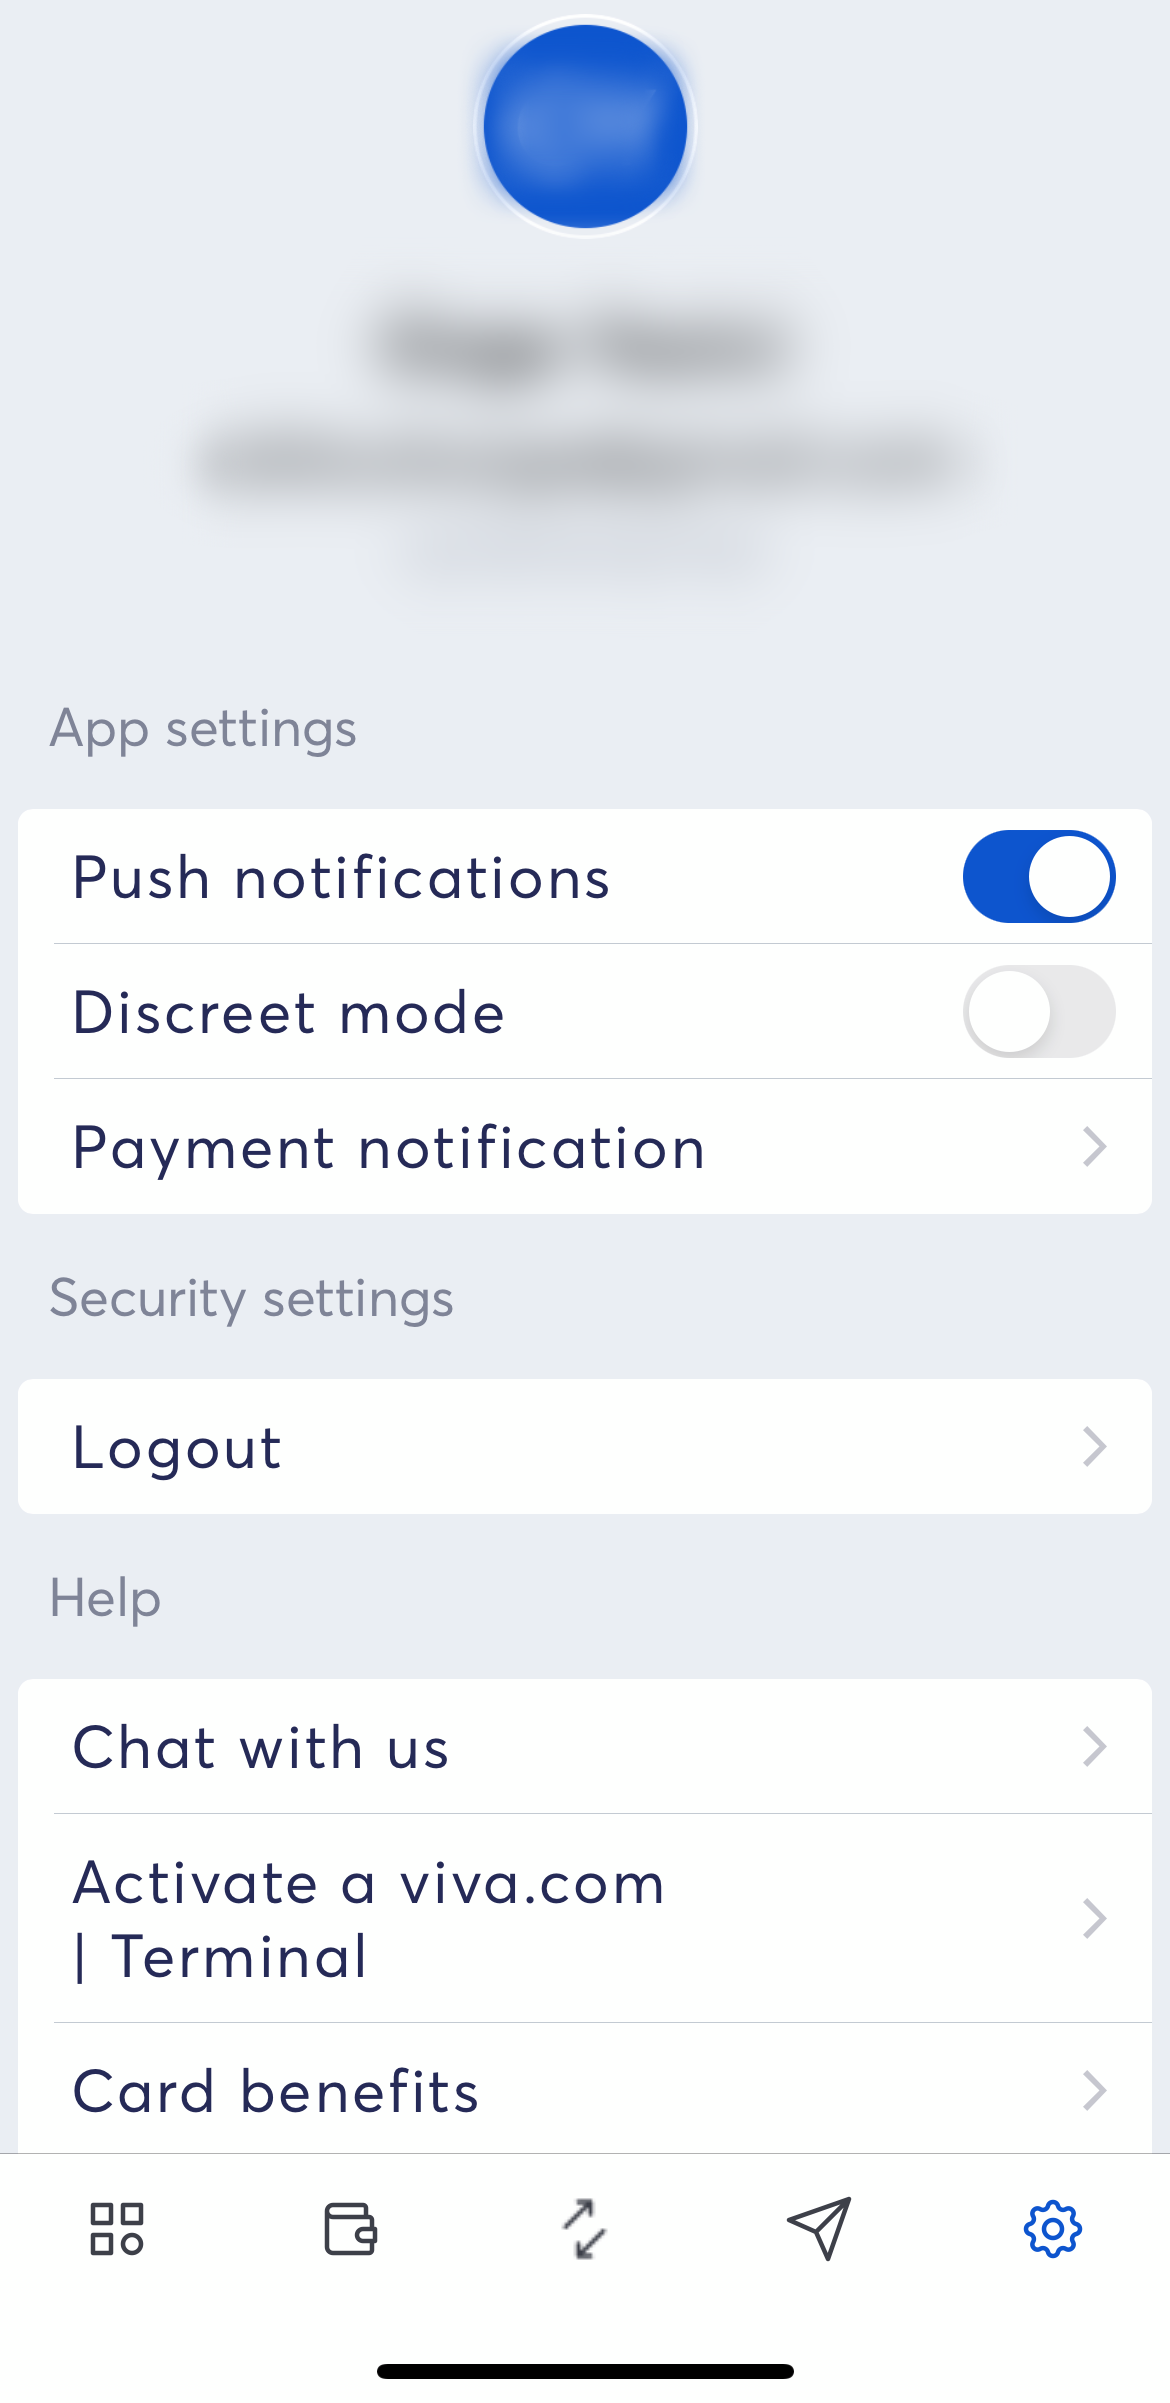
You can then manually enter the Serial Number of your POS device before clicking ‘Activate device’:
Finally, you can complete the setup of your POS device
Get Support
If you would like to integrate with Viva, or if you have any queries about our products and solutions, please see our Contact & Support page to see how we can help!
